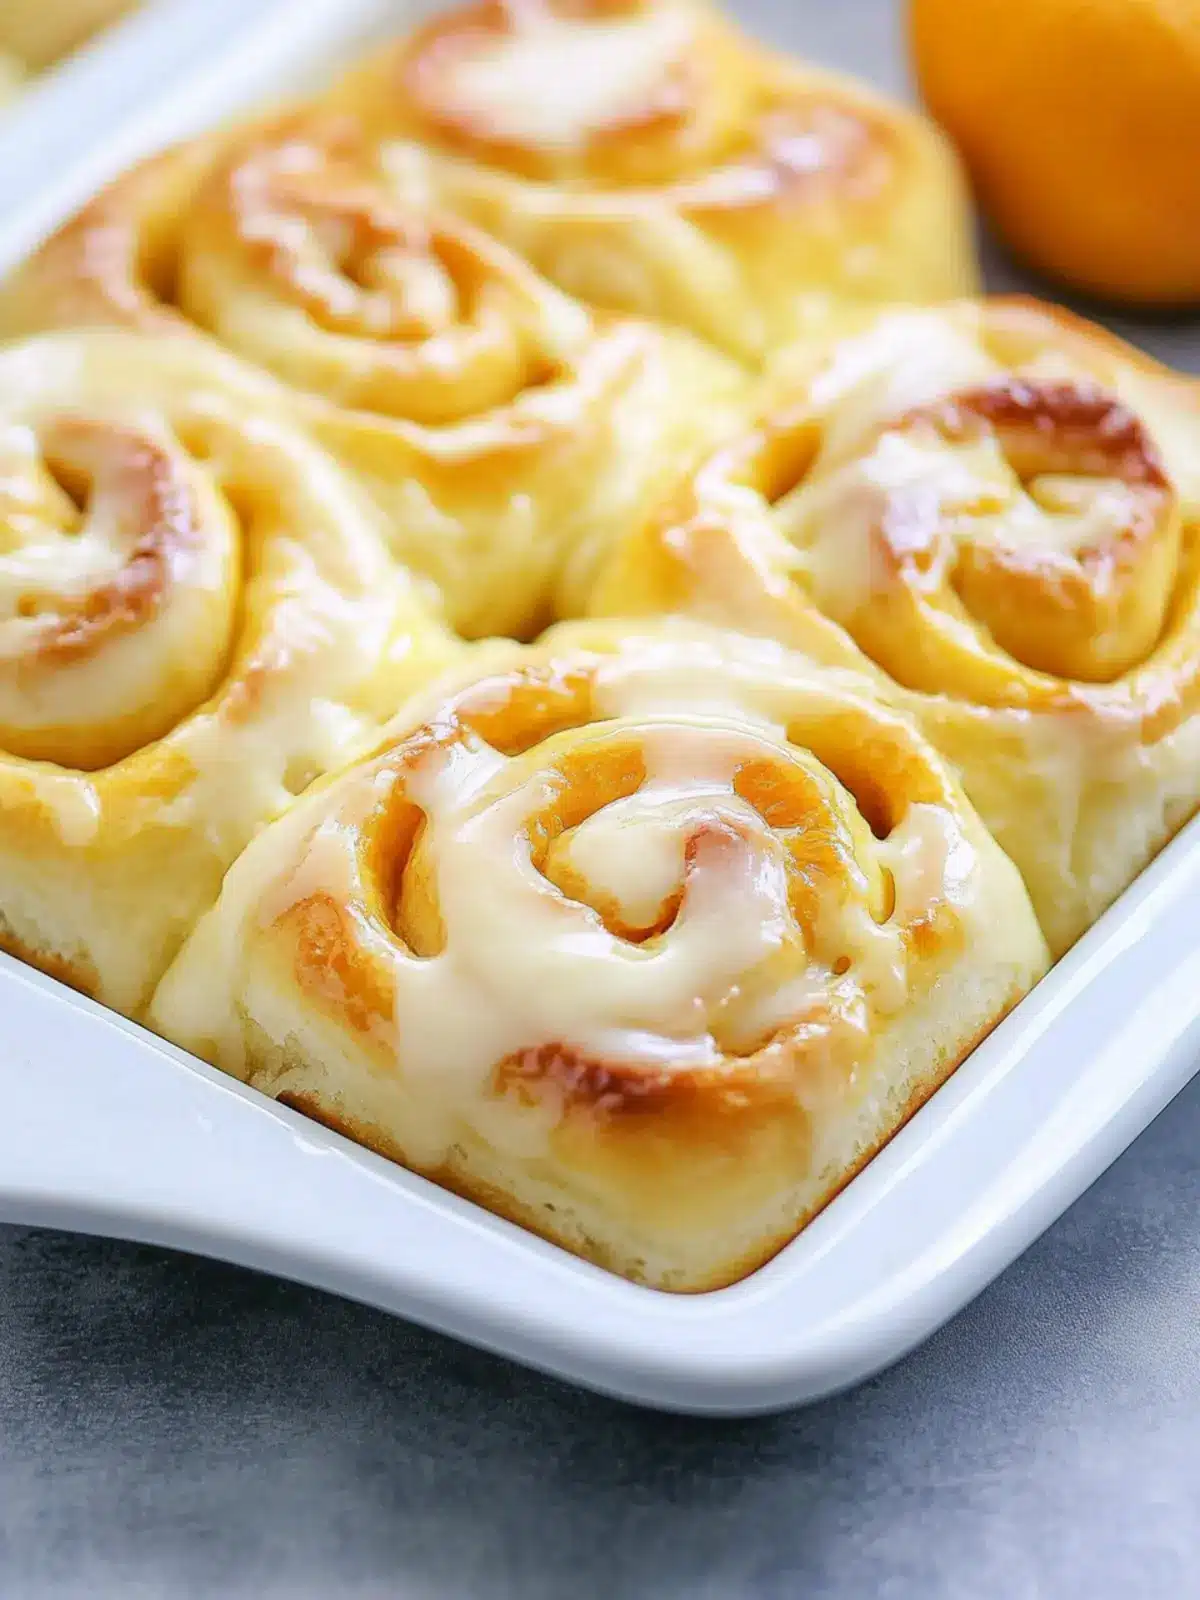
There’s nothing quite like waking up to the smell of freshly baked Glazed Orange Rolls filling the air. Picture this: the sun gently creeping through your kitchen window, illuminating the soft, fluffy rolls resting on your counter, crowned with a luscious orange glaze just waiting to be drizzled on top. These delightful sweet rolls are perfect for weekend brunches, holiday gatherings, or anytime you want to treat yourself and your loved ones to something extraordinary.
I discovered this recipe during a cozy Sunday morning, and it instantly became a staple in my home. The warmth of the orange zest paired with the sweet glaze creates a comforting flavor that dances on your taste buds, making every bite a little celebration. Whether enjoyed with a cup of coffee or served alongside mimosas, these rolls are sure to become the highlight of your breakfast table. Let’s dive into this recipe and bring some sunshine into your kitchen!

Why are Glazed Orange Rolls so special?
Soft, Fluffy Texture: These rolls are incredibly light and fluffy, perfect for a comforting breakfast.
Irresistible Citrus Flavor: The bright orange zest and sweet glaze create a mouthwatering flavor that elevates your morning routine.
Easy to Make: With straightforward steps, even novice bakers can whip up a batch without stress.
Ideal for Any Occasion: Whether it’s a holiday brunch or a weekend treat, these rolls fit seamlessly into any setting.
Crowd-Pleasing Delight: They’re sure to impress family and friends, making your gatherings even more memorable.
Perfect Pairing: Serve them warm with coffee or mimosas for a delightful brunch experience. Enjoy your cooking adventure, and don’t forget to check out more delicious brunch ideas on our blog!
Glazed Orange Rolls Ingredients
For the Dough
• 4 Tablespoons granulated sugar – Primary sweetener; coconut sugar can be used for a caramel twist.
• 2 Tablespoons active dry yeast – Essential for rising; instant yeast works too—just skip the proofing step.
• 1/2 cup warm water – Activates the yeast; ensure it’s between 100°F to 110°F for best results.
• 1 ⅓ cups whole milk – Provides rich moisture; must be scalded and cooled before adding to the mix.
• 2 large eggs – Enriches the dough and binds ingredients; room temperature eggs integrate better.
• 1 teaspoon salt – Enhances flavor and strengthens gluten for a perfect texture.
• 5 cups all-purpose flour – Forms the structure; for a gluten-free option, try using a gluten-free blend.
• 1/2 cup salted butter – Creates a tender, fluffy roll; margarine or oil can be substituted for a dairy-free version.
For the Filling
• 1/3 cup granulated sugar – Sweetens the filling, intensifying the orange flavor.
• 3 Tablespoons orange zest – Delivers that vibrant citrus note; lemon zest makes a lovely alternative.
For the Glaze
• 1 ½ cups powdered sugar – Adds sweetness and texture; feel free to reduce for a lighter glaze.
• 3 Tablespoons orange juice – Moistens the glaze and packs a citrus punch; lemon juice can also add a zesty flavor.
How to Make Glazed Orange Rolls
-
Proof the Yeast: In a small bowl, combine warm water, 2 tablespoons of sugar, and active dry yeast. Stir gently and let it sit for about 5-10 minutes until foamy. This step ensures your rolls will rise beautifully!
-
Scald the Milk: In a small saucepan, heat the milk over medium heat until just before boiling. Remove from heat and allow it to cool for about 12 minutes. This process enriches the dough and prepares it for perfect rising.
-
Mix the Dough: In your stand mixer, combine the proofed yeast, eggs, and cooled milk. Start mixing on low speed to combine everything evenly before moving on to the next step.
-
Incorporate the Flour: Gradually add in the flour, mixing until a soft dough begins to form. Switch to the dough hook and knead until the dough is smooth and elastic, around 5-7 minutes.
-
First Rise: Place the dough in a greased bowl, cover it with a clean kitchen towel, and let it rise in a warm, draft-free area for about 1 hour, or until it doubles in size.
-
Prepare the Filling: While the dough is rising, mix together the softened butter, sugar, and orange zest in a small bowl until fully combined. This filling will add a delightful sweetness.
-
Shape the Rolls: Roll out the dough on a floured surface into a rectangle. Evenly spread the filling mixture over the dough. Fold and cut into strips, then twist each strip into knots or rolls.
-
Second Rise: Place the shaped rolls onto a baking sheet lined with parchment paper. Cover and allow them to rise for an additional 30 minutes, which makes them extra fluffy.
-
Bake the Rolls: Preheat your oven to 375°F (190°C). Bake the rolls for 11-12 minutes, or until they’re golden brown and your kitchen is filled with delicious aromas.
-
Glaze the Rolls: While the rolls are warm, drizzle them with a glaze made from powdered sugar and orange juice. Let them sit for at least 30 minutes to allow the glaze to set before serving.
Optional: Top with a sprinkle of extra orange zest for added flair.
Exact quantities are listed in the recipe card below.

Make Ahead Options
These Glazed Orange Rolls are perfect for meal prep, allowing busy cooks to enjoy freshly baked goodness without the morning rush. You can prepare the dough up to 24 hours in advance. Simply follow the instructions through the first rise, then punch down the dough and wrap it tightly in plastic wrap before refrigerating. When you’re ready to bake, remove the dough from the fridge, let it come to room temperature (about 30 minutes), shape the rolls, and allow for the second rise before popping them in the oven. To maintain their soft and fluffy texture, ensure they are stored properly and served fresh for the best quality. Enjoy the convenience of having delightful Glazed Orange Rolls ready for any occasion!
Glazed Orange Rolls Variations
Make your Glazed Orange Rolls even more delightful by personalizing them to suit your taste preferences!
- Gluten-Free: Substitute all-purpose flour with a gluten-free flour blend for a gluten-free version of these delightful rolls.
- Dairy-Free: Swap out the butter with coconut oil or dairy-free margarine, and use any plant-based milk for a vegan-friendly option.
- Citrus Twist: Mix things up by using lemon or lime zest in place of orange zest for a zesty variation.
- Fruit Add-ins: Incorporate dried cranberries or chocolate chips into the dough for an unexpected burst of flavor and texture.
- Sweet Spice: Add a teaspoon of nutmeg or cinnamon to the dough for a warm hint of spice, making these rolls extra comforting and inviting.
- Frosting Finish: Try a cream cheese frosting instead of a glaze for a richer and more indulgent treat.
- More Glaze: Drizzle a thicker layer of orange or lemon glaze over the top for an extra sweet kick that feels like sunshine in every bite.
- Herb Infusion: Incorporate fresh rosemary or thyme into the filling for an aromatic twist that beautifully complements the citrus flavor.
Feel free to get creative and experiment with these variations to find your perfect combination!
Storage Tips for Glazed Orange Rolls
Room Temperature: Keep your Glazed Orange Rolls in an airtight container at room temperature for up to 3-4 days to maintain freshness and softness.
Fridge: If needed, you can store the rolls in the fridge for up to a week, but they may become slightly denser. Reheat before serving for best results.
Freezer: For longer storage, freeze the unglazed rolls in a freezer-safe bag for up to 2 months. Thaw overnight in the fridge and glaze after reheating.
Reheating: Warm up the rolls in a 350°F (175°C) oven for 5-10 minutes or microwave for 20-30 seconds for a soft, gooey treat.
Expert Tips for Glazed Orange Rolls
-
Perfect Temperature: Ensure your warm water is between 100°F to 110°F; too hot can kill the yeast, affecting your Glazed Orange Rolls’ rise.
-
Flour Gradually: Add flour slowly during mixing; this prevents a tough dough and helps achieve that fluffy texture we’re aiming for.
-
Warm Rising Space: Let your dough rise in a warm, draft-free area; this is essential for maximizing volume and ensuring soft, fluffy rolls.
-
Don’t Rush the Glaze: Allow the rolls to cool for about 30 minutes after glazing. This waiting period helps the glaze set perfectly and adds that irresistible shine.
-
Flavor Boost: Consider adding a pinch of nutmeg or cinnamon to the dough for an extra layer of flavor in your Glazed Orange Rolls; it’s a delightful surprise!
What to Serve with Glazed Orange Rolls?
Imagine your brunch table brimming with delightful flavors and vibrant colors, ready to create unforgettable moments with loved ones.
-
Fresh Fruit Salad: A medley of seasonal fruits adds a bright, refreshing contrast to the sweet, sticky rolls. The natural sweetness complements the citrus notes perfectly.
-
Classic Mimosas: Sparkling champagne paired with fresh orange juice enhances the brunch experience, lifting spirits and adding a celebratory touch to your meal.
-
Creamy Scrambled Eggs: Fluffy, buttery eggs provide a savory balance to the sweetness of the rolls, creating a well-rounded breakfast plate that delights every palate.
-
Crispy Bacon: The smoky saltiness of crispy bacon against the sweet rolls creates a delightful flavor contrast you won’t be able to resist. Crisp up some strips for an indulgent combination.
-
Yogurt Parfait: Layers of creamy yogurt with granola and fruit bring a refreshing, tangy component to your brunch spread while adding texture and nutrition.
-
Coffee Infused with Orange Zest: Brew your coffee with a hint of orange zest to echo the flavors of the rolls, wrapping your taste buds in a cozy, fragrant embrace.
Each of these pairings enhances your Glazed Orange Rolls, promoting a joyful and memorable dining experience. Enjoy creating your perfect brunch tableau!
Glazed Orange Rolls Recipe FAQs
How do I select ripe oranges for zesting?
Absolutely! When choosing oranges for zesting, look for fruit that is firm and heavy for its size, indicating juiciness. The skin should be bright and smooth without any dark spots or blemishes. If you can smell the citrus aroma, it’s a good sign that the flavor will be vibrant!
How should I store leftover Glazed Orange Rolls?
I recommend storing your Glazed Orange Rolls in an airtight container at room temperature for up to 3-4 days to keep them soft and flavorful. If you need to keep them longer, you can refrigerate them for up to a week. Just remember, they may lose a bit of their fluffiness, so warm them back up to make them delightful again!
Can I freeze my Glazed Orange Rolls?
Absolutely! For freezing, I suggest letting the rolls cool completely and then placing them in a freezer-safe bag without glaze. They will stay good for up to 2 months. When you’re ready to indulge, thaw the rolls overnight in the fridge and glaze them just before enjoying, which keeps the texture light and tasty!
What should I do if my dough doesn’t rise?
Very common! If your dough doesn’t rise, first check the yeast’s expiration date; old yeast won’t activate. Make sure you used water that’s warm (not too hot) to activate the yeast properly. If you experience cool kitchen temperatures, try placing the bowl in a warm spot or even an oven preheated to the lowest setting (then turned off) to provide a cozy environment for rising.
Are there any dietary considerations for the Glazed Orange Rolls?
Great question! Since these rolls contain gluten and dairy, they are not suitable for those with gluten sensitivity or lactose intolerance. However, feel free to explore alternatives such as gluten-free flour blends and dairy-free butter or milk to accommodate different dietary needs. Just remember that different ingredients might slightly alter the texture and taste!
How can I achieve the perfect glaze consistency?
To create that irresistible glaze, mix powdered sugar and orange juice in a bowl, adjusting the amount of juice to get your desired consistency. If it’s too thick, add a drop of orange juice at a time. If too thin, add a bit more powdered sugar. It should be smooth and pourable but not runny. Give it a taste for sweetness, and don’t forget to wait before drizzling to allow it to set beautifully!

Irresistible Glazed Orange Rolls for Your Perfect Brunch
Ingredients
Equipment
Method
- Proof the Yeast: In a small bowl, combine warm water, 2 tablespoons of sugar, and active dry yeast. Stir gently and let it sit for about 5-10 minutes until foamy.
- Scald the Milk: Heat the milk over medium heat until just before boiling. Remove from heat and allow it to cool for about 12 minutes.
- Mix the Dough: In your stand mixer, combine the proofed yeast, eggs, and cooled milk. Start mixing on low speed.
- Incorporate the Flour: Gradually add in the flour, and knead until the dough is smooth and elastic, around 5-7 minutes.
- First Rise: Place the dough in a greased bowl, cover it, and let it rise in a warm area for about 1 hour.
- Prepare the Filling: Mix together the softened butter, sugar, and orange zest in a small bowl.
- Shape the Rolls: Roll out the dough into a rectangle, spread the filling, and cut into strips or knots.
- Second Rise: Place the shaped rolls onto a baking sheet and cover to rise for an additional 30 minutes.
- Bake the Rolls: Preheat your oven to 375°F (190°C) and bake for 11-12 minutes until golden brown.
- Glaze the Rolls: Drizzle with a glaze made from powdered sugar and orange juice while warm.